Flash Appointments User's Guide

Schedule Staff

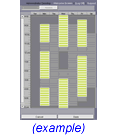
See sample

Receptionist : Schedule Staff

Each Staff or Resource that accepts appointments must have a work schedule during which appointments can be made.

The schedule is a combination a regular weekly hours plus exceptions, time-off and overtime. When a staff does not accept appointments at the same times every week, it is okay to omit the regular schedule and simply define exceptions.

This is an Essentials Check List item.

A Administrator, Receptionist or Staff Login is required.

Business Hours must be entered first.

Instructions

Regular Hours:

Specify the hours in a typical week during which the selected staff/resource accepts online appointments. The hours available for Staff/Resource are constrained by the Business Regular Hours, which must be entered first.
  1. Select the option regular hours (Sun-Sat)
  2. Click the black down triangle to the right of the Select staff drop list. Select the name of the Staff/Resource whose hours you want to edit. In a moment the hours grid is populated with the data for the Staff/Resource.
  3. Click the Edit button at the bottom of the screen. Current Staff/Resource Regular Hours are highlighted. By default Staff have no regular hours so nothing will be highlighted for new Staff.
  4. Each cell represents one time interval as defined in the Business Details area. Click the mouse button and drag over time ranges during which the Staff will accept appointments.
  5. Adjust the selected hours by clicking an individual cell or by clicking and dragging a range of cells. Each new selection sets the state of the cells to the opposite state of the top left cell.

Exception Hours:

Specify the times when the selected staff/resource works overtime or has time-off. The hours available for Staff/Resource are constrained by the Business Regular Hours and Business Exception Hours, which must be entered first.
  1. Select the option 'exceptions (time off/overtime)'
  2. Click the black 'down' triangle to the right of the Select staff drop list. Select the name of the Staff/Resource whose hours you want to edit. In a moment the hours grid is populated with the data for the Staff/Resource.
  3. On the calendar, select the first day of a one week range that you want to work with. You may specify up to 1 week at a time.
  4. Click the Edit button at the bottom of the screen. Current Staff/Resource Hours for the selected week are highlighted. By default Staff have no exception hours so nothing will be highlighted for new Staff.
  5. Each cell represents one time interval as defined in the Business Details area. Click the mouse button and drag over time ranges during which the Staff will accept appointments.
  6. Adjust the selected hours by clicking an individual cell or by clicking and dragging a range of cells. Each new selection sets the state of the cells to the opposite state of the top left cell.